
How to Choose Stain for My Hardwood Floors? | When it comes to transforming your home, few things make as dramatic an impact as beautifully stained hardwood floors. But if you’ve ever wondered, “How do I choose a stain for my hardwood floors?” you’re not alone. This is one of the most common questions homeowners ask, and at Smith Bros Floors, we’re here to guide you through the process with the expertise of Nick Broadley, one of our seasoned specialists.
In a recent YouTube video, Nick walks us through the meticulous stain sample process while working with a homeowner in Calgary, Alberta. To see Nick in action you can watch the video for a closer look. Here, we’ll break down the key steps and tips he shared, helping you understand what goes into choosing the perfect stain for your hardwood floors.
Step 1: Understanding Your Blank Canvas
Whether you’re refinishing existing hardwood or installing brand-new floors, the first step in selecting a stain is understanding your starting point. In this homeowner’s case, the upstairs floors were newly installed—a blank slate with endless possibilities. If you’re working with existing floors, you might consider whether you want to match the current stain or explore a new colour that better suits your space.
Nick emphasizes that new flooring offers the flexibility to explore various stain options without being constrained by the need to match other areas. This gives you the opportunity to create a cohesive look or make a bold statement.
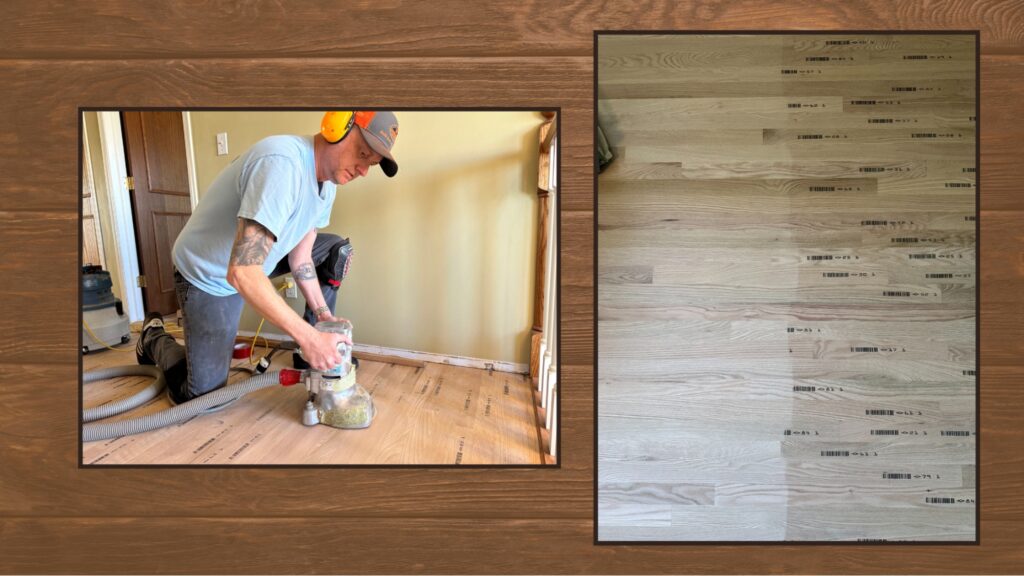
Step 2: The Preparation Process
Before any stain touches the floor, proper preparation is essential. Here’s how Nick gets the floor ready:
- Sanding with 40-Grit Sandpaper: This initial sanding step removes any dents, uneven surfaces, or imperfections, ensuring the floor is level.
- Fine Sanding with 80-Grit Sandpaper: A second pass with finer sandpaper smooths out the surface, eliminating any leftover imperfections and creating the ideal canvas for stain application.
- Water Popping: Water popping is a critical but often overlooked step. Nick explains that this involves soaking the floor with wet rags to open up the wood grain. By doing this, the wood absorbs the stain more evenly, resulting in richer and more vibrant colours.
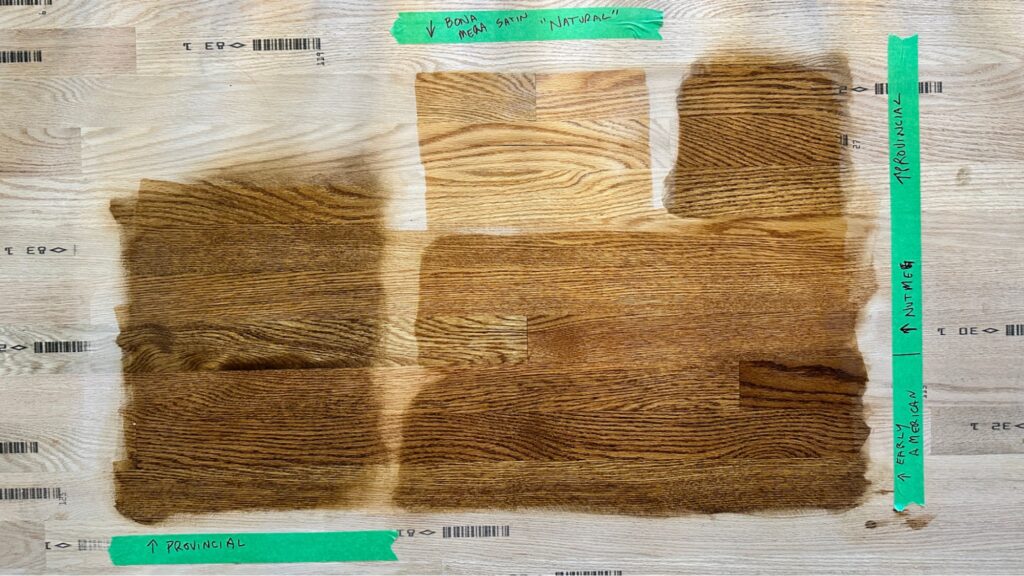
Step 3: Sampling Stains
Now comes the exciting part: testing stains. Nick recommends starting with small patches of a few different colours. This allows homeowners to see how the stain interacts with their specific wood species and lighting conditions. In this project, Nick applied multiple stain samples to showcase the range of possibilities.
Once the homeowner has narrowed down their choices, Nick takes it a step further by creating a larger sample area. This helps homeowners visualize the stain more accurately, giving them confidence in their decision before committing to the entire floor.
Step 4: Visualizing the Transformation
One of the challenges Nick mentions is helping homeowners imagine how the final product will look. Stained hardwood floors undergo a significant transformation, especially once the stain is evenly applied and finished with a protective topcoat. The result is a floor that not only complements your home’s aesthetic but also enhances its overall character.
Nick reassures homeowners that this dramatic change is part of the process. Seeing the larger sample with the chosen stain colour and sheen gives a clearer picture of the finished product.
Factors to Consider When Choosing a Stain
Choosing the right stain isn’t just about picking a colour you like. Here are some factors Nick recommends considering:
- Wood Species: Different wood species absorb stain differently. For example, oak often takes stain well and highlights its natural grain, while maple can be trickier to stain evenly.
- Lighting: The amount of natural and artificial light in your space can significantly impact how a stain appears. Always view samples in the room where the flooring will be installed.
- Home Style: Consider your home’s overall design and decor. Dark stains can add drama and elegance, while lighter stains create a fresh and airy feel.
- Durability: Stains with protective finishes not only enhance the look of your floors but also protect them from wear and tear.
Why Work with Smith Bros Floors?
With decades of experience serving Calgary and beyond, Smith Bros Floors brings unmatched expertise to every project. Our stain sample process is designed to make the decision-making process stress-free and enjoyable. From selecting the perfect stain to ensuring a flawless finish, our team, led by specialists like Nick Broadley, takes pride in delivering results that exceed expectations.
We understand that choosing a stain for your hardwood floors is a big decision, and we’re here to guide you every step of the way. Whether you’re looking for a classic oak finish, a trendy grey stain, or something completely unique, Smith Bros Floors has you covered.
Key Takeaways
- Preparation Matters: Proper sanding and water popping are essential for achieving a smooth, even stain application.
- Samples Are Key: Testing multiple stains in both small and large patches helps you visualize the final product and make an informed decision.
- Consider the Big Picture: Think about how the stain will complement your home’s style, lighting, and existing design elements.
- Work with Experts: Trust the professionals at Smith Bros Floors to guide you through the process and deliver exceptional results.
Ready to Transform Your Floors?
Choosing the right stain for your hardwood floors doesn’t have to be overwhelming. With the expertise of Smith Bros Floors and our comprehensive stain sample process, you can achieve a stunning look that brings out the best in your home. Contact us today to schedule a consultation and take the first step toward the floors of your dreams.
📞 Call us at (403) 255-7791
🌐 Visit our website: www.smithbrosfloors.com