Hardwood floors are durable and easy to maintain. However, eventually, they show gouges, scratches, discolouring and wear caused by high traffic, scraping furniture legs, pet claws, spills, UV exposure and/or high humidity. These imperfections detract from the beauty of the wood and increase the risk of further wear and tear. Many people assume that worn wood floors need to be completely sanded to look good again. That’s not necessarily true. Whole floor refinishing is messy, disruptive and costly and most hardwood flooring can endure only a few refinishings before it becomes brittle. So how can you stretch the time between refinishing projects? How can you repair those small worn areas? Spot treating is the answer. It’s a good alternative to whole floor refinishing. The following are some tips to help you deal with damaged hardwood floors and minor imperfections.
Know your finish: With many types of floor finishes available, it’s important to know which one was used on your floor so you can match it. Your flooring provider or a flooring specialist can help with the identification. There are several options:
- Oil-based polyurethane
- Water-based polyurethane
- Wax coating
- Varnish
- Stain
- Aluminum oxide coating
Clean: No matter what type of damage you’re dealing with, begin with a gentle but thorough clean. Remove all dust, hair and grime, using a vacuum or soft mop. Mix 2 to 4 drops of liquid soap in a quart of water and put it in a spray bottle. Lightly mist the areas requiring cleaning and rub with a microfiber mop/cloth. Then, lightly spray with fresh water and use a soft dry cloth to buff the floor. Avoid brooms, abrasive scrub pads and liquid cleaners.
The floor is scratched but the varnish is in place: There are many repair options for minor scratches based on the number and severity of marks.
- For only one or two small scratches, mix equal parts apple cider vinegar and olive oil in a small cup. Dab the mixture into the scratch. Leave it for the rest of the day. Then rub it out.
- Small scratches that don’t penetrate the varnish can be handled with a wipe-on floor rejuvenator product available in most hardware stores or from a flooring specialist. These solutions hide surface scratching quite well.
- Camouflage small scratches with a walnut. Warm up the oil in the nut with your fingers, then rub into worn areas of the floor using small circular motions. Let the oil sit for a few minutes, then buff with a soft cloth.
- Coconut oil can also minimize scratch marks on unfinished or freshly sanded floors. Apply a thin coat of coconut oil with a brush or sponge, leave it for five minutes. Then buff with a soft cloth.
- If the scratches are too deep for wipe-on products, try applying wax using a soft cloth. Wood wax can be clear, but also comes in common wood shades. If needed, use a plastic putty knife to force the wax into the scratch. Then remove the excess wax and buff the area.
- If your floor has a polyurethane finish, try a touch-up polyurethane repair kit. Follow the manufacturer’s instructions.
Deeper scratches that penetrate the finish and the wood:
- Fill the scratch with wood filler that matches your floor (see a reputable wood flooring provider) and let dry. Fillers come in many colours and may need to be blended to match your floor exactly. Sand the scratch with 150 grit paper, then buff.
- Cover scratches with a wood stain that matches your floor. Use a Q-tip to remove any excess stain and let dry.
- Try stain markers and/or blending pencils. Apply to the scratch according to package directions, wipe away any excess, and allow to dry thoroughly.
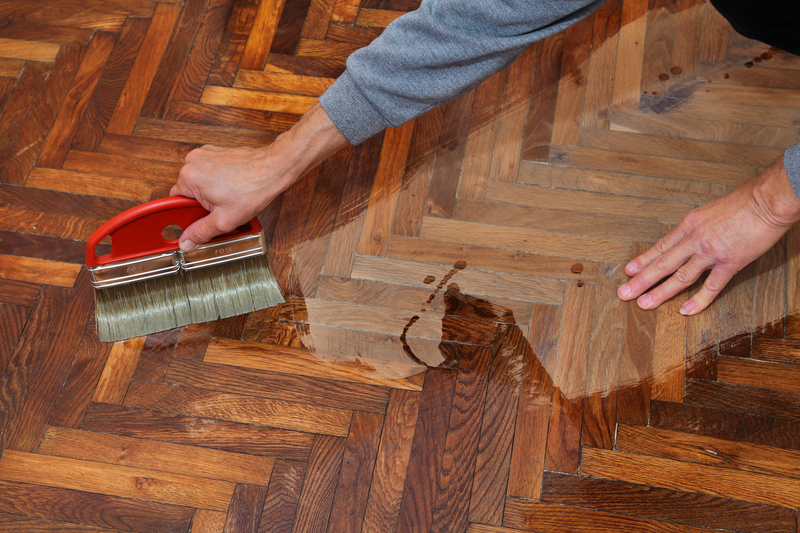
Worn areas where the colour is gone: Rub a matching stain into the worn areas then coat with the varnish/finish originally used.
Discolouration due to UV rays:
- Use a floor buffer with a 60 grid screen and run it over the area to remove the shine. Be careful to stop when the discoloration is gone. Vacuum the wood thoroughly. Use an 80 grid screen and repeat the buffing and vacuuming. Now use a 120 grit screen. Apply a stain that matches your floor. Let dry. Finish by applying the varnish/finish originally used on the floor. You may need more than one coat.
- Alternatively, replace faded areas with new hardwood floorboards in the same colour, size and species as the original.
To remove water stains: Use a stiff brush and minimal water to scrub the area. Wipe with a soft cloth and let dry. If you encounter mould, scrub with TSP. Gently sand using fine-grit sandpaper. Vacuum. Then wax/refinish the repaired area.
Hardwood floors are renowned for their stunning, rustic aesthetic and they make a fabulous addition to any room. Though they are hard-wearing and durable, hardwood floors can succumb to scratches and the effects of heavy traffic. Before you resign yourself to the mess, disruption and expense of a full floor refinishing, try one of these simple repair techniques. The most suitable method depends on the type of floor, type of finish and type of damage your floorboards have endured. More severe damage might require the help of a professional flooring company.
Looking for quality wood flooring? Interested in exceptional service and advice? Contact Smith Bros. Floors, one of Canada’s oldest hardwood flooring companies; family-owned and operated. We use industry-leading flooring and finishes because we want your flooring to last! With a tested crew of installers and finishers and a lifetime guarantee on workmanship and longevity, Smith Bros. quality cannot be beaten! We provide exemplary customer service, from site visit, to quote, to installation and follow-up. Call us at 403-255-7791 for a free consultation.